

The TI Innovator Hub is a new device that is designed to be used in conjunction with a TI-84 plus CE or TI-nspire calculator to help teach students about coding, programming, and engineering principles. The TI team has a collection of lesson plans and integration strategies to help you get started, and for teachers looking to incorporate these skills into STEM subjects, there are a variety of possibilities! Let’s check it out.
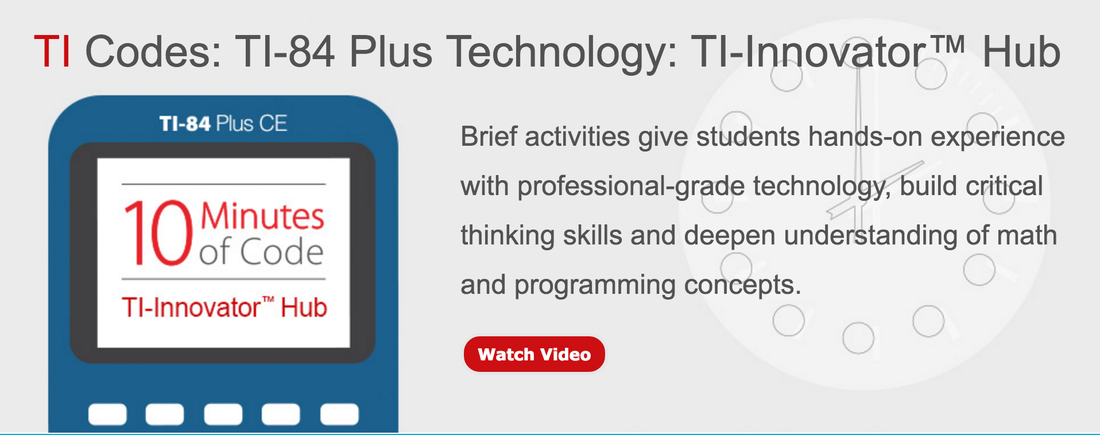
Before diving into the review, here’s an overview video from the TI team that shares some students’ experiences with the Innovator Hub:
To start out with some perspective, I don’t see the Innovator Hub as being a tool you would use to give elementary (or even early middle school) students their first experience with coding and programming. This isn’t Code.org, or Lego WeDo, or Scratch, or anything along those lines. This is writing programs (in a very specific language, with very specific syntax) on your TI graphing calculator, and sending those programs to the Innovator Hub to execute.
Another note, I think any teacher who would be using the Innovator Hub in the classroom would need to be very familiar not only with the hardware side, but also with the programming language and knowing how to troubleshoot/bug check. It would be pretty easy to have students entering commands wrong, having typos in their programs, and things along those lines, and any teacher using this resource would necessarily have to resolve those issues quickly and correctly.
One last point, before getting started with the Innovator Hub, you’ll need to make sure your TI-84 plus CE operating system is up to date and that you’ve installed the Hub app on it as well. You can view the eGuide for the Hub here, which can be helpful in getting everything set up.

So with that out of the way, let’s take a look at what the Innovator Hub is all about!
I found the best place to start with the Innovator Hub was the 10 Minutes of Code section of their website. Here I was guided through some introductory activities to get more familiar with how to write programs for the Innovator Hub and understand what types of things the Hub was capable of doing.
Unit 1: Getting Started contains 3 basic “Skill Builders” for students to begin to understand how to control the Hub. This section ends with an Application activity where students simulate a traffic light with the Hub’s LED light.
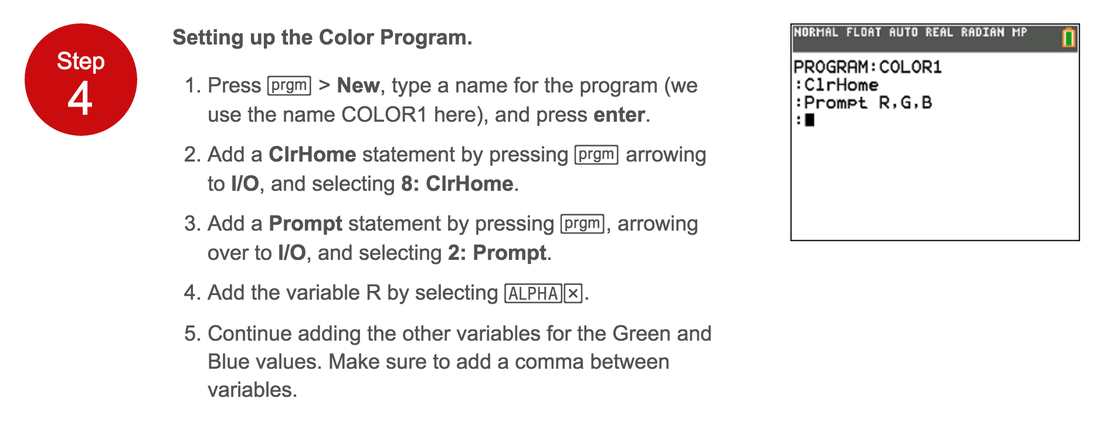
One thing to point out, through all of these activities, the support is primarily in text form, with a few images scattered throughout. There are no gifs, or videos, and I think that following these steps could be potentially confusing for students with diverse learning needs, particularly when each “Step” is actually broken down into multiple other steps.
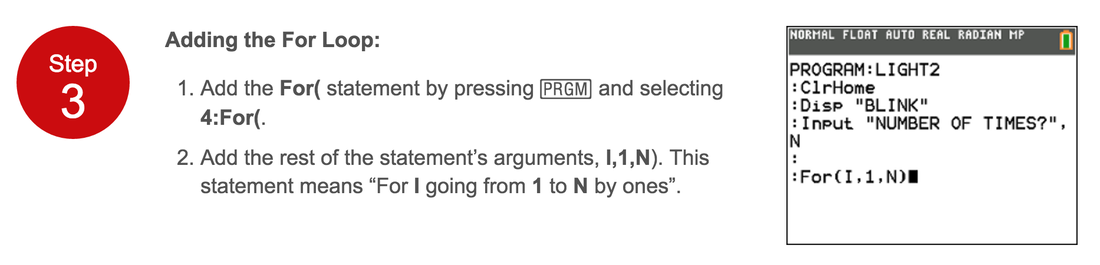
Once students complete those basic skills, Unit 2 is about using the For loop which will let you control how many times you would like an action to occur. While I was working through Unit 2, I realized there were times where I was just being asked to do something, without a great explanation being provided as to why. So if I was new to programming, I could potentially create these programs successfully, but I would still have a lot of confusion about what I was doing and what I was entering for some of the commands.
Finally, Unit 3 gets into exploring Brightness, If, and While commands to help students further understand the different possibilities that are available with the Hub. In the end, you do have an enormous range of programming possibilities (as shown in the opening video), and there are all sorts of different motors and attachments you can add to the Hub to control as well (more information about those here under Breadboard Resources).

Once students have completed the 10 minutes of code (which I see as taking closer to 1-2 hours conservatively), the Science Through Engineering Design is a great place to go next.
Here, teachers and students will have access to project-based STEM activities where they can put their new programming skills to use.
TI currently has 6 activities available, 3 classroom lessons and 3 iPad specific lessons, which you can check out here.
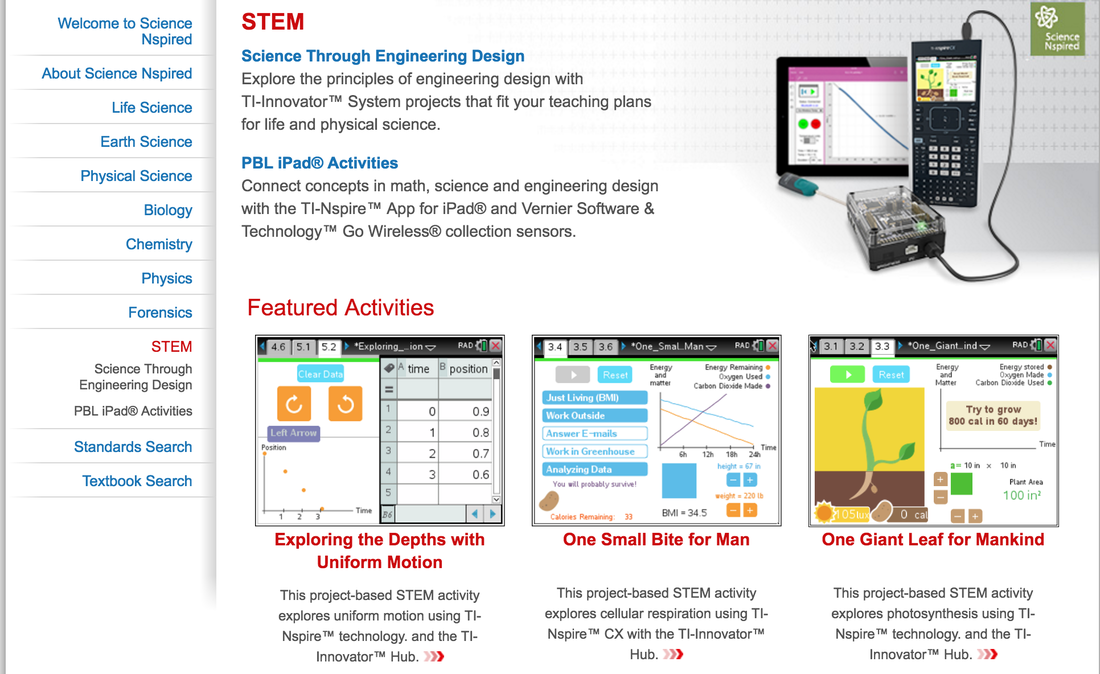
Each of the activities includes a lesson overview with the objectives, vocabulary, and an outline of what the students will do. The Standards Alignment section is also really nice because you can select your specific school standards from their list and see exactly how this activity aligns with them.
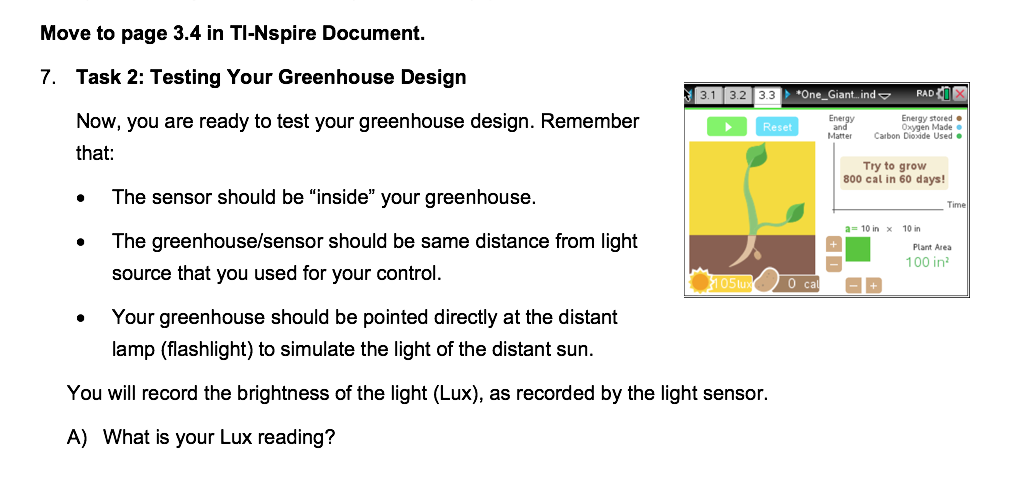
The activities also include all the lesson resources you would need to launch the activity in your classroom including student work packets, teacher guides, answer keys, and more. Here’s an example of a student activity if you’d like to check it out (from the One Giant Leaf for Mankind lab).
These activities were the highlight for me, and they do offer lots of hands-on STEM work, and incorporate a ton of great critical thinking skills and link programming to biology and physics. However, there are currently only 6 to choose from, I think this is one area where some serious expansion is needed.
The last section to explore is the Path to STEM Projects, which is designed to help students create their own projects from scratch. This section includes lessons how to do things like setting digital output, getting digital input, setting analog output, and so on. Each of these is centered around a specific project (e.g. “build a speaker” for setting digital output) and includes a collection of resources for the student and teacher.
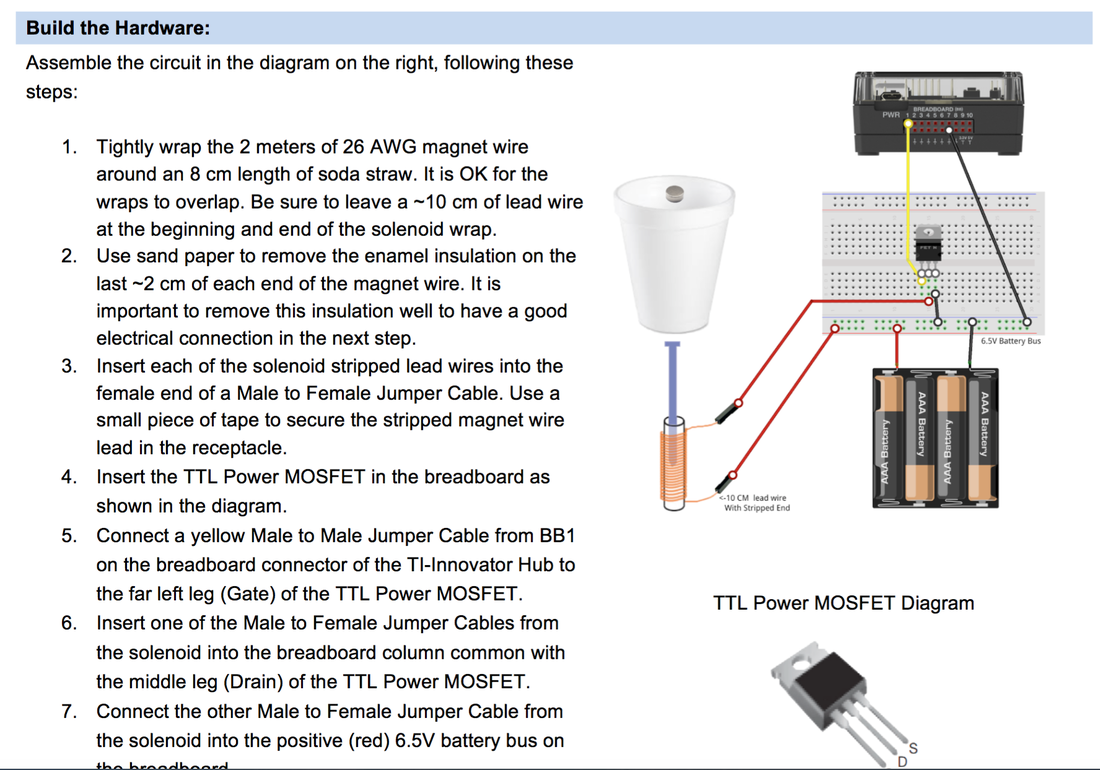
That being said, they aren’t the most student-friendly resources. For example, here’s what you’re looking at when you start out with the “build a speaker” project (the first one in the series):

As you can see, incredibly text heavy and highly technical. For ESL students, students with reading difficulties, or students who are intimated by science/technical writing, this would be an absolute nightmare.
The directions for assembling the speaker aren’t much better. You get an image, but with highly technical and specific schematics that would be difficult for anyone but the most advanced student to follow:
Now, I realize that programming, coding, and engineering are not easy tasks that you can just wake up one morning and do. And I think having high expectations for our students and giving them challenges that they sometimes fail at is important as well. I also realize that what we’re seeing here is very standard when it comes to support resources for things like the Arduino, Raspberry Pi, and so on.
However, I don’t believe that this necessarily needs to be the standard for these types of activities. For most students, the lack of support provided here would be setting students up for repeated failure and frustration.
STEM fields have a long history of being highly exclusionary, in part because of the reasons we’re seeing here. These support resources are not designed for students who may need scaffolding. They are designed for highly literate students, with advanced technical knowledge, who are highly motivated, and most students who don’t fit that mold would be incredibly frustrated trying to accomplish these tasks (based on my own experiences in similar circumstances). If you’re in an upper-level high school class, and you have students who can handle this type of material, then these are great resources. Otherwise, you’re going to need to provide a lot of support for your students.
So, while I absolutely appreciate where TI is coming from with the Innovator Hub, and while I absolutely agree that these skills are important for 21st century learners to develop, the support that is currently in place from TI is not enough for me to recommend the Innovator Hub to any classroom that has students with diverse learning needs, because the support just isn’t there.
After speaking with the TI team about this issue, we had a great conversation about ways to improve these current offerings and what future resources could be provided in order to better support students. So hopefully those get added in and I’ll be able to update this review with that new material.
TI has also been working on rolling out a “train the trainer” type program where they are working with local teachers and coaches to train them on how to help other teachers in their area get started using the Innovator Hub, which I think will be a great step to boost their professional development offerings.
In short, the hardware works great, the programming possibilities are enormous, but the support resources are currently not strong enough to justify the integration of the Innovator Hub in the many schools, particularly in classrooms where students have diverse learning needs.

The opinions expressed in this review are my own.
I was not compensated for writing this review.


 RSS Feed
