Mobile Permissions fortunately makes this process a whole lot easier by sending permission slips directly to a parent’s/guardian’s phone.
To create your group or class, you’ll need three things:
- Your students’ names
- The names of their parent(s) or guardian(s)
- The phone numbers for their parent(s) or guardian(s)
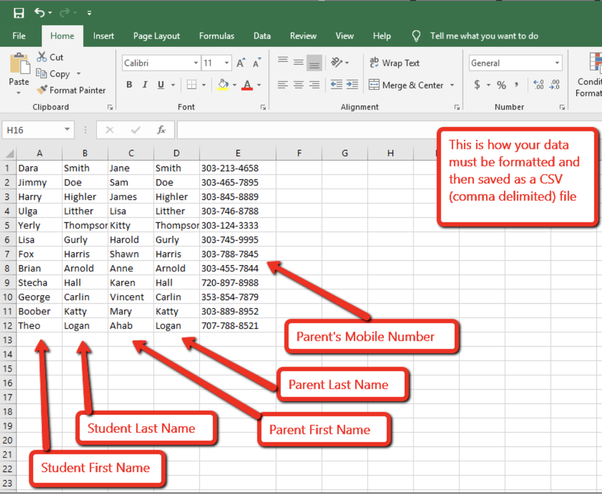
Once you have that information, you’ll need to put it into a .csv (through Excel, Numbers, or Open Office) so that it can be imported into the system:
Once all that information has been imported, you’re ready to create your first mobile permission slip!
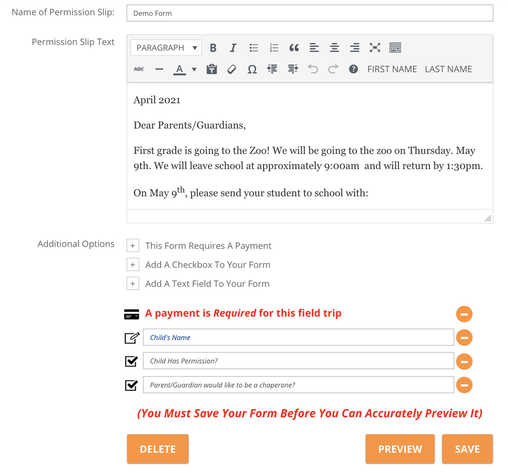
To do that, you’ll head to the “Forms” menu and choose to create a new form. Your permission slip form can be copied and pasted from a Google or Word document, or you can just start from scratch.
One of the best parts is, you can also choose if your form requires a payment, or if there are any boxes to check, or text to fill in. This way, if you’re needing more than just permission, you can collect that information from parents and guardians as well.
It’s important to note that you can add in as many checkboxes and text fields as you would like, and after parents read the text of the permission slip, they will be asked to fill in these fields. Before sending out your first permission slip, I’d recommend doing a test with your own phone number, just to see how the process works:
After you’ve created your permission slip, you’re ready to send it!
You’ll select the group / class that you want to receive the form, and then the specific form that you’re wanting to send. At this point you can also choose to send the form to the whole group, or to specific individuals within the group (in case everyone doesn’t need a copy).
Parents/Guardians will then receive a text message with a link to the form that needs to be completed.
Once they click on the link, they can read the permission slip, add in any information you requested, and digitally sign the form. They can also choose to receive a PDF email copy of the permission slip, which is a nice feature to see.
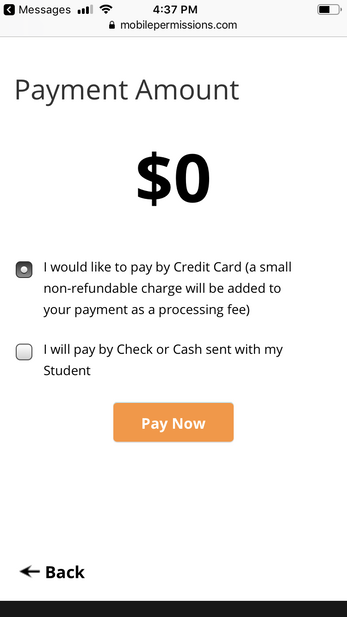
After they submit that information, they’ll be asked to make a payment (if one is required). One important note, there’s no way for the teacher to set a specific amount on the payment page. For example, if your permission slip required that parents/guardians pay $5, they can still enter whatever payment amount they’d like. This way, teachers can give parents the flexibility to pay for additional things (like lunch), pay less/more (for example if they’re a chaperone), or pay a portion up front and a portion later.
Plus, it’s great to see that parents/guardians can pay with a credit card (a 7-11% processing fee applies) or through cash/check sent with students. The ability to pay for a field trip through a credit/debit card normally just isn’t an option for so many teachers.
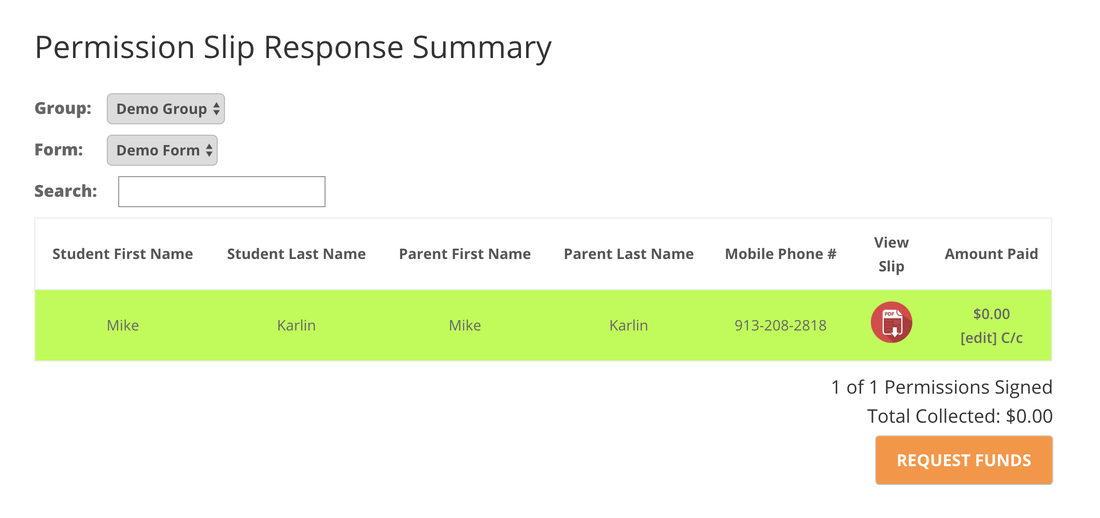
Once parents/guardians begin submitting forms, you can easily check on their responses and see who has submitted their permission and who hasn’t.
You can also see who has paid via credit card and which students need to bring in a cash/check payment. Plus, you can download a PDF copy of any submitted forms.
Overall, it’s a simple and straightforward resource that teachers can use to create, send, track, and manage permission slips and payment. And the best part of all, it’s completely free for teachers to use!
If you’re a teacher, coach, or school staff member who is in charge of planning and organizing student field trips, I absolutely recommend signing up for a free account on Mobile Permissions.
It’s a great resource, and one that I wish I’d have had access to while I was a K-12 teacher!
I was not compensated for writing this review.


 RSS Feed
