

Dremel’s 3D Idea Builder is a 3D printer that has been designed with education in mind. For those unfamiliar, 3D printers have seen an increase in popularity, particularly with the spread of the Maker Movement, and they allow for 3D objects to be printed out of various forms of plastic. Many schools have begun purchasing 3D printers, and there are a wide variety of types and brands to choose from.
This review will focus on Dremel’s 3D20 Idea Builder, but before jumping into the review if you’re still a little unfamiliar with 3D printing, here’s a great introductory video from PBS about how they work and they can be used in business and in education.
This review will focus on Dremel’s 3D20 Idea Builder, but before jumping into the review if you’re still a little unfamiliar with 3D printing, here’s a great introductory video from PBS about how they work and they can be used in business and in education.
Also before we begin, here’s an overview video from Make: and the team at Dremel that gives a little background on the 3D printer and their goals in creating this printer:
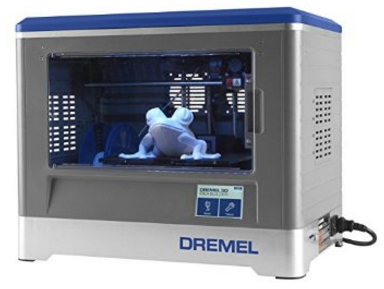
Now that you’ve seen the Idea Builder in action, and have a little background on what the product is all about, let’s take a deeper look.
If you’re new to 3D printing, and you’re trying to find ideas for how this technology can be used in the classroom, this Edutopia post is a good place to start. This review will primarily focus on the Dremel Idea Builder in action, how it works, it’s ease of use, and so on. But we’ll also cover some curricular aspects as well, as this printer does come with some curricular resources that can be used in the classroom.
To begin with: setup. I’ll be honest, I’m usually not a fan of reading instruction manuals and watching tutorials on how to set things up. Not only do I like to figure it out on my own, I also hold the belief that a well-designed tool or resource should be relatively intuitive and if designed right, shouldn’t really require many setup instructions.
Operating from this perspective, I was incredibly impressed with the Dremel Idea Builder. I’ve worked with some other 3D printers in the past, and getting them set up and ready to print has not always been the most straightforward task. With the Idea Builder, everything (including unboxing) was ready to go in under 15-minutes. For those interested, here’s a short video covering the process:
On top of that, the Dremel team also has an excellent collection of easy to follow video tutorials for everything you might need to know.
Once the setup was complete, I was ready to try and actually print something. The Dremel Idea Builder comes with some designs preloaded onto the machine, as well as a flashcard with preloaded designs.
Additionally, the printer comes with an education pack SD card that includes curricular lesson plans and 3D designs to support those lessons, which we’ll get into a little bit later, but let’s talk about the printing aspect first.
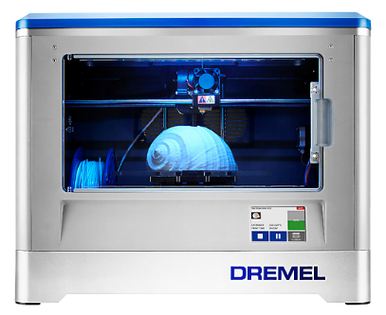
After my initial printing (which was incredibly easy, quiet, and only smelled a little bit like burnt plastic - which is a common side effect of using 3D printers to essentially build things out of melted plastic), I took the 3D printer into the Teaching Technology Lab where I work with and teach preservice teachers at Indiana University.
I was fortunate to receive this review unit in time for our education technology course’s week on maker spaces, so we were able to have around 150 preservice experiment with the Idea Builder and put it through its paces. After a week of students playing with it, and essentially non-stop printing, I am happy to report that we didn’t run into a single issue. There were no jams, no mis-prints, and everything came out looking great!
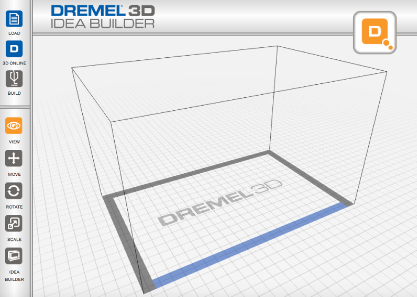
Next up, let’s talk about the software. When designing 3D objects to be printed, there are a variety of ways to create your object. Dremel has partnered with Autodesk, specifically their 123D and TinkerCad software packages, so that you can design your own objects for printing. Additionally, you can also use Dremel’s online gallery for printing pre-created objects as well.
Plus, Dremel offers a free download of Dremel 3D software, which you can use to easily “slice” your 3D objects, or convert them into a format that your printer understands. This software is also incredibly user friendly (it took our team about 10 minutes to get familiar with it), and it basically allows you to rotate, scale, and move your object so that you can get the right dimensions and location when sending the file to the printer.
It’s important to note that any 3D object you download or create will need to go through this “slicing” process so that it is converted into a file type that the printer will understand.
Finally, let’s talk a little about this curriculum. As I mentioned in the beginning of this post, schools all over the world are purchasing 3D printers for various classrooms and programs. Unfortunately, these purchases are not always backed by alignment to curricular goals.
Dremel is the first 3D printer that I’ve seen that actually includes standards-based lesson plans that can be used alongside the objects that you are printing. Here’s all the details and a step-by-step walkthrough:
Plus, MyStemKits.com has also partnered with Dremel to help create a great variety of STEM lesson plans for elementary and secondary science and math classes. One of my favorite examples (being a former biology teacher), was the printable Punnett square dice example where students could learn about genetics and inheritance through 3D printed dice.
And if you’re interested in really digging in, you can check out 3 case studies that Dremel has shared on how their printer is specifically being used in the classroom context.
That being said, for the price (around $1000), I do think it would be beneficial to include more than just 10 lesson plans. I would really love to see Dremel put some more resources into developing additional curriculum, and also lesson plans that are aligned with the Next Generation Science Standards (NGSS) and not just the Common Core Standards.
Aside from that, if you’re looking for a 3D printer that is incredibly user friendly, easy to set-up, and includes a standards-aligned curricular pack, then I absolutely recommend checking out the Dremel Idea Builder. Both my and my students’ experiences were incredibly positive with the printer, and it’s definitely been the easiest printer I’ve seen in terms of approachability and software use.
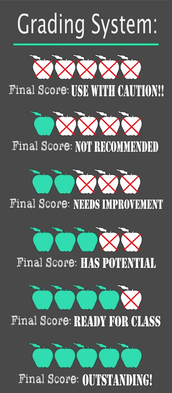
So with all that in mind…

The opinions expressed in this review are my own.
I was not compensated for writing this review.
I received a temporary review unit to use while writing this review.


 RSS Feed
