As shown in the video, ClassFlow covers a whole lot of bases. From designing lessons, to creating interactive content, to tracking student behavior, to a whole lot more. For those interested in a tutorial on getting started with ClassFlow, here’s a good one to start with. There are also a TON of short tutorial videos throughout ClassFlow that you can use if you run into any trouble.
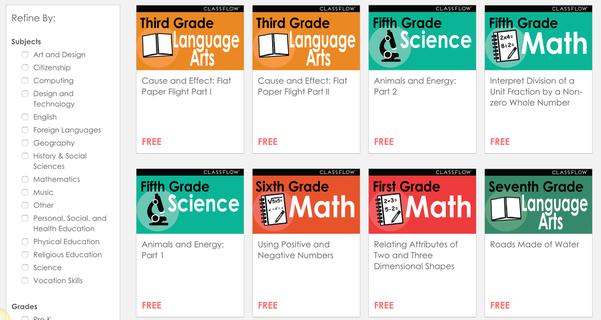
Once you’ve created a free account, a good place to start is the Marketplace. From here, you can explore, use, and customize lessons that other educators have already created. You can filter the pre-created lessons by both subject area and grade level.
When you click on a lesson you’ll get a detailed description of what it covers, what standards it addresses, and so on. You can also choose to import the lesson into your ClassFlow resources (in order to use and edit later) or send the lesson out through email.
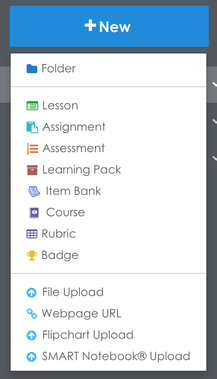
If you prefer to create or use your own lessons, rather than those that have already been created, that’s definitely an option as well. You can import basically any presentation format (PowerPoint, SMART Notebook, ActivInspire, PDF, etc.) and use it within the ClassFlow system, or you can create your own lesson from scratch as well. To begin, just click the New button and choose file upload or SMART Notebook upload.
After you import your slides, you’ll still need to head into the lesson builder, so that you can integrate what you uploaded with the assessments and other interactive content that you want to add.
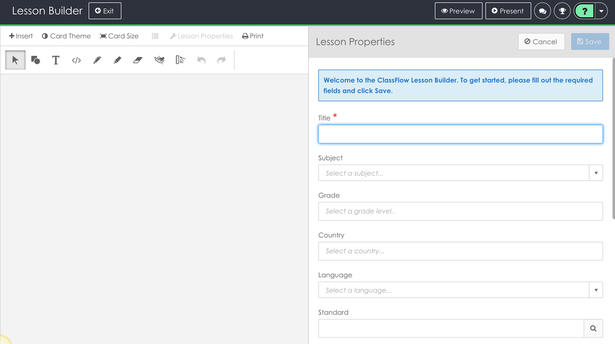
For PowerPoint slides, there’s no way to edit the content of the slides once you’ve uploaded them (although you can reorder them), so it’s best to make sure your presentation is all set up and ready to go before you import it into the system. When you are ready to make your lesson, just click New again and choose lesson to jump into the Lesson Builder.
From there, you’ll want to provide some basic information about your lesson (name, description, grade level, subject area, standards, etc.) and then you’ll be ready to start building or adding in the slides that you’ve uploaded.
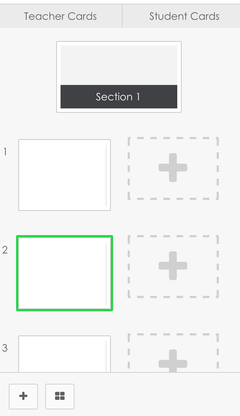
Once you’ve provided that basic information, you’re ready to start making your lesson. If you hit Insert at the top, you can add in any slides you’ve imported. If you’re building from scratch, you can use the + button at the bottom left to add in a new card (aka slide) or section (like a title/header slide).
All the typical options for a presentation creator are available. You can add in text, images, links, and even HTML content if you’d like to embed something you’ve created on another site. You can also change your themes, add in teacher notes, and basically anything else you might want to do.
I should also mention, there is one feature that I really love, which is the ability to add student slides in addition to your teacher slides, so that what you see on your device can be different than what the students see on their device. To set this up, click on the four squares at the bottom left and then you can add in student cards to pair with any and all teacher cards that you would like to.
Next, let’s talk a little bit about adding in formative assessment options. The easiest way is to click on the settings gear at the top right corner of a card and choose add questions. You’ll be taken into the Assessment Builder where you can create as many question sets as you want. Think of a question set as a group of questions that you want to be able to use.
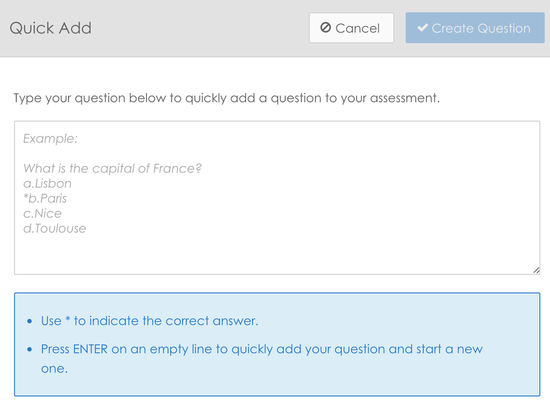
You’ll need to name the set, and then from there, you can add in the individual questions that you want to by choosing Quick add (great for multiple choice questions) or add (great for all other types).
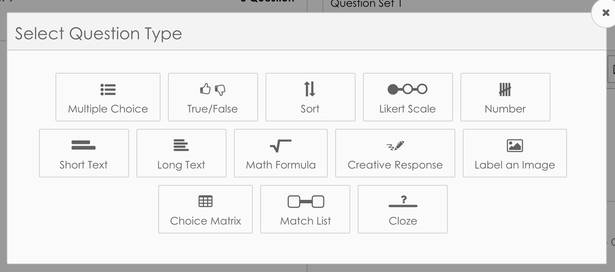
If you go with Add instead, you’ll have the option of adding in a large collection of question and assessment types:
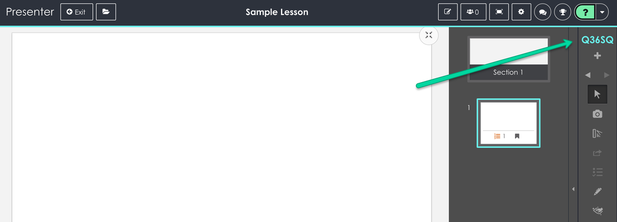
Once you’ve added in your questions, and finished your lesson, you’ll be able to share it out with your students. We’ll cover how to add students in a moment, but if you click Present from the lesson builder screen, you’ll be able to launch an ad hoc presentation where students can join in by going to www.classflow.com/student and entering in the code at the top right corner of your screen.
It’s important to note that you won’t be able to preview any of your built-in assessments until a student joins in. Once they’ve joined the session, then you’ll be able to start the assessment (and get feedback on how students are doing) whenever you’d like to.
You can also choose to launch a poll from the right side menu, even if it’s something you haven’t pre-created in the assessment builder. This is a great feature for when something comes up during class that you hadn’t prepared for or planned out ahead of time. Here’s a great video that shows how this can be used, and also shows how you can use interactive content in your polls as well:
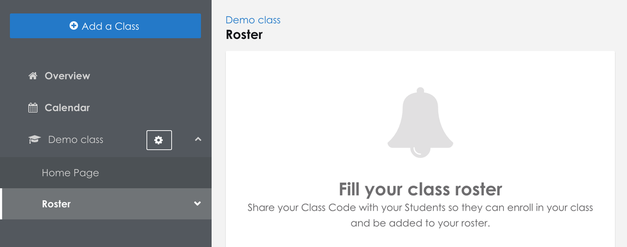
As I mentioned earlier, you’ll also want to set up your classes at some point. From the Classes menu at the top of the application, you can choose to Add a Class and then define some basic characteristics about it (name, grade level, etc.). I’d recommend using the “student created roster” so that students will create a ClassFlow account and then just enter in the class code that you’re given. This way, you’ll be able to track assessment data of your students.
Once you have your classes, lessons, and assessment set up, the general idea would be that you would:
1) Select the lesson you want to use.
2) Click Deliver.
3) Have your students login to ClassFlow and enter the presentation code.
4) Start presenting and launch your assessments whenever you’d like!
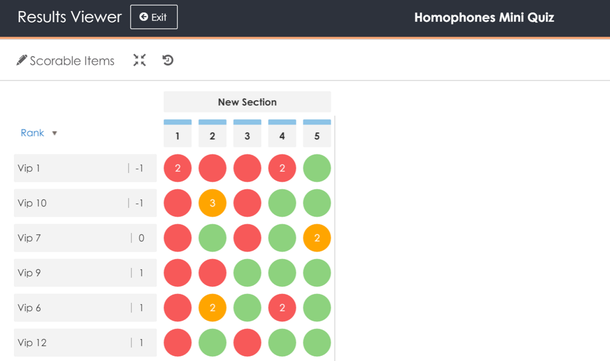
As a teacher, you can also be logged in on two separate devices (i.e. your projector computer and an iPad or cell phone). That way, you can see student response data on one device, while still using the other device to show the presentation. ClassFlow will collect all sorts of student assessment data so that you can get a quick snapshot of exactly where your students are at with the assessments you’ve sent out.
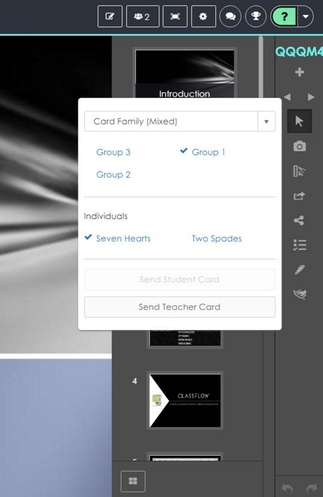
The last thing to mention is that during your presentation, you can also click the Differentiate / Share button on the right side in order to send out different versions of your lessons to different individuals or groups. This way, you could have modified versions of your slides to better meet the needs of students at different ability levels. From the student perspective, they’ll all be engaged in the same presentation, but they can also be working at completely different levels if need be.
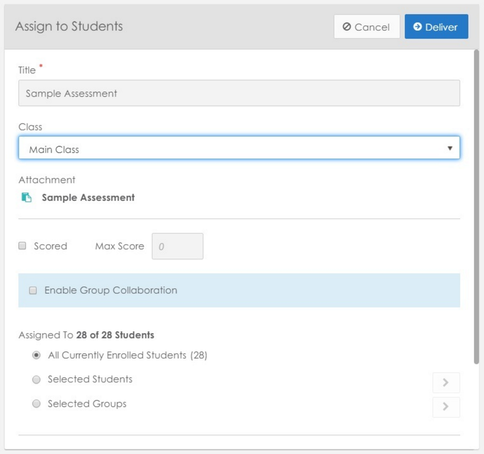
In addition to presentation and assessment options, you can also create assignments, which are a collection of lessons and resources that can be sent out to students to complete during class or outside the classroom as well. This can be great if you want to build activities that will extend beyond class time (i.e. for flipped learning), or if you want students to be collaborating on different assignments in groups, or anything along those lines.
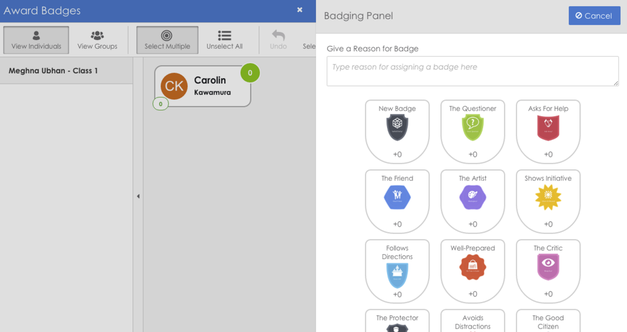
Finally, you’ve also got the ability to create and give out custom badges. This feature is similar to what services like Class Dojo offer, where you can award positive and negative points for things the students do, say, or complete. Here’s a video explaining more about creating badges and one on awarding badges.
There are additional features available (rubrics, learning packs, item banks, and courses), but for the purposes of this review, the lessons, assessments, and differentiation possibilities are what I wanted to spend the most time covering.
I’ll close by saying, ClassFlow has a lot to it (as you may have noticed), and I think this is a good thing. It combines what would normally take 2-3 different apps into one, very easy to use package. That being said, it might take a little while for teachers to get used to the workflow of the app, which is why it’s awesome to see how many video tutorials are offered throughout the site.
Additionally, if you’re a school or district leader and able to round up 25 teachers, ClassFlow will actually organize a free professional development session for you so that you can get trained on how to use the software. For classroom teachers who are interested in organizing a PD session, you can check out the ClassFlow House Party option, which is also a great way to organize a training. Sessions like these would also be great to learn a little more about ClassFlow’s more advanced features:
Overall, I’m a big fan of ClassFlow. Learning the ins and outs of the system may take a little while, but I do believe that it’s a worthwhile investment of time. If you’re using presentations in your classroom, ClassFlow allows you to take them to an entirely new level by adding in a wide variety of formative assessment possibilities as well as the option of differentiating your presentation for the students in your class.
If you’re wanting to get started, I would recommend checking out a few of their tutorials inside of the application, because they’re not only helpful, but very short and to the point as well. And of course, I’m happy to answer any questions you may have as well, either in the comments or via email.
With all that in mind, if you’re looking for a way to make your presentations more engaging, and to collect formative assessment data from your students to gain real time snapshots of student learning, I absolutely recommend trying ClassFlow. The ability to differentiate lessons, add student specific slides, create assignments, use badges, and all the other features are awesome as well, and make ClassFlow a well-built, user friendly resource that covers a huge range of classroom needs.
The opinions expressed in this review are my own.
I was not compensated for writing this review.









 RSS Feed
